
the ultimate guide to New Zealand's Tongariro Alpine Crossing
The Tongariro Alpine Crossing is one of those quintessential New Zealand treks all travelers hear about and backpackers flock to. Despite its popularity and reputation for stunning views, and the years I’ve cumulatively spent in New Zealand, I hadn’t ever made my way to hike it. I suppose when you’re living in a place you take it for granted. I suppose it’s also fair to mention that times when I had planned to trek the Tongariro, inclement weather made it impossible and the trails were closed.
Since my bucket list is piled high with natural landmarks and world wonders, this time around in New Zealand, I was bound and determined to mark the crossing off. My girl Tash offered to trek the Tongariro Alpine Crossing with me giving us ample Inca Trail flash backs and about 5.5 hours of catch up banter.
WHEN SHOULD I HIKE?
The trail is open all year ‘round. However, you’ll need to be a seasoned trekker who is extra prepared to brave the conditions in the winter. I’d suggest hiking in the summer or autumn months, as the weather will be a bit more predictable, which in turn means an increased chance nicer views. In the colder months, you might run into clouds and foggy views. You can find out information on trail conditions here.
HOW HARD IS IT + HOW FIT SHOULD I BE?
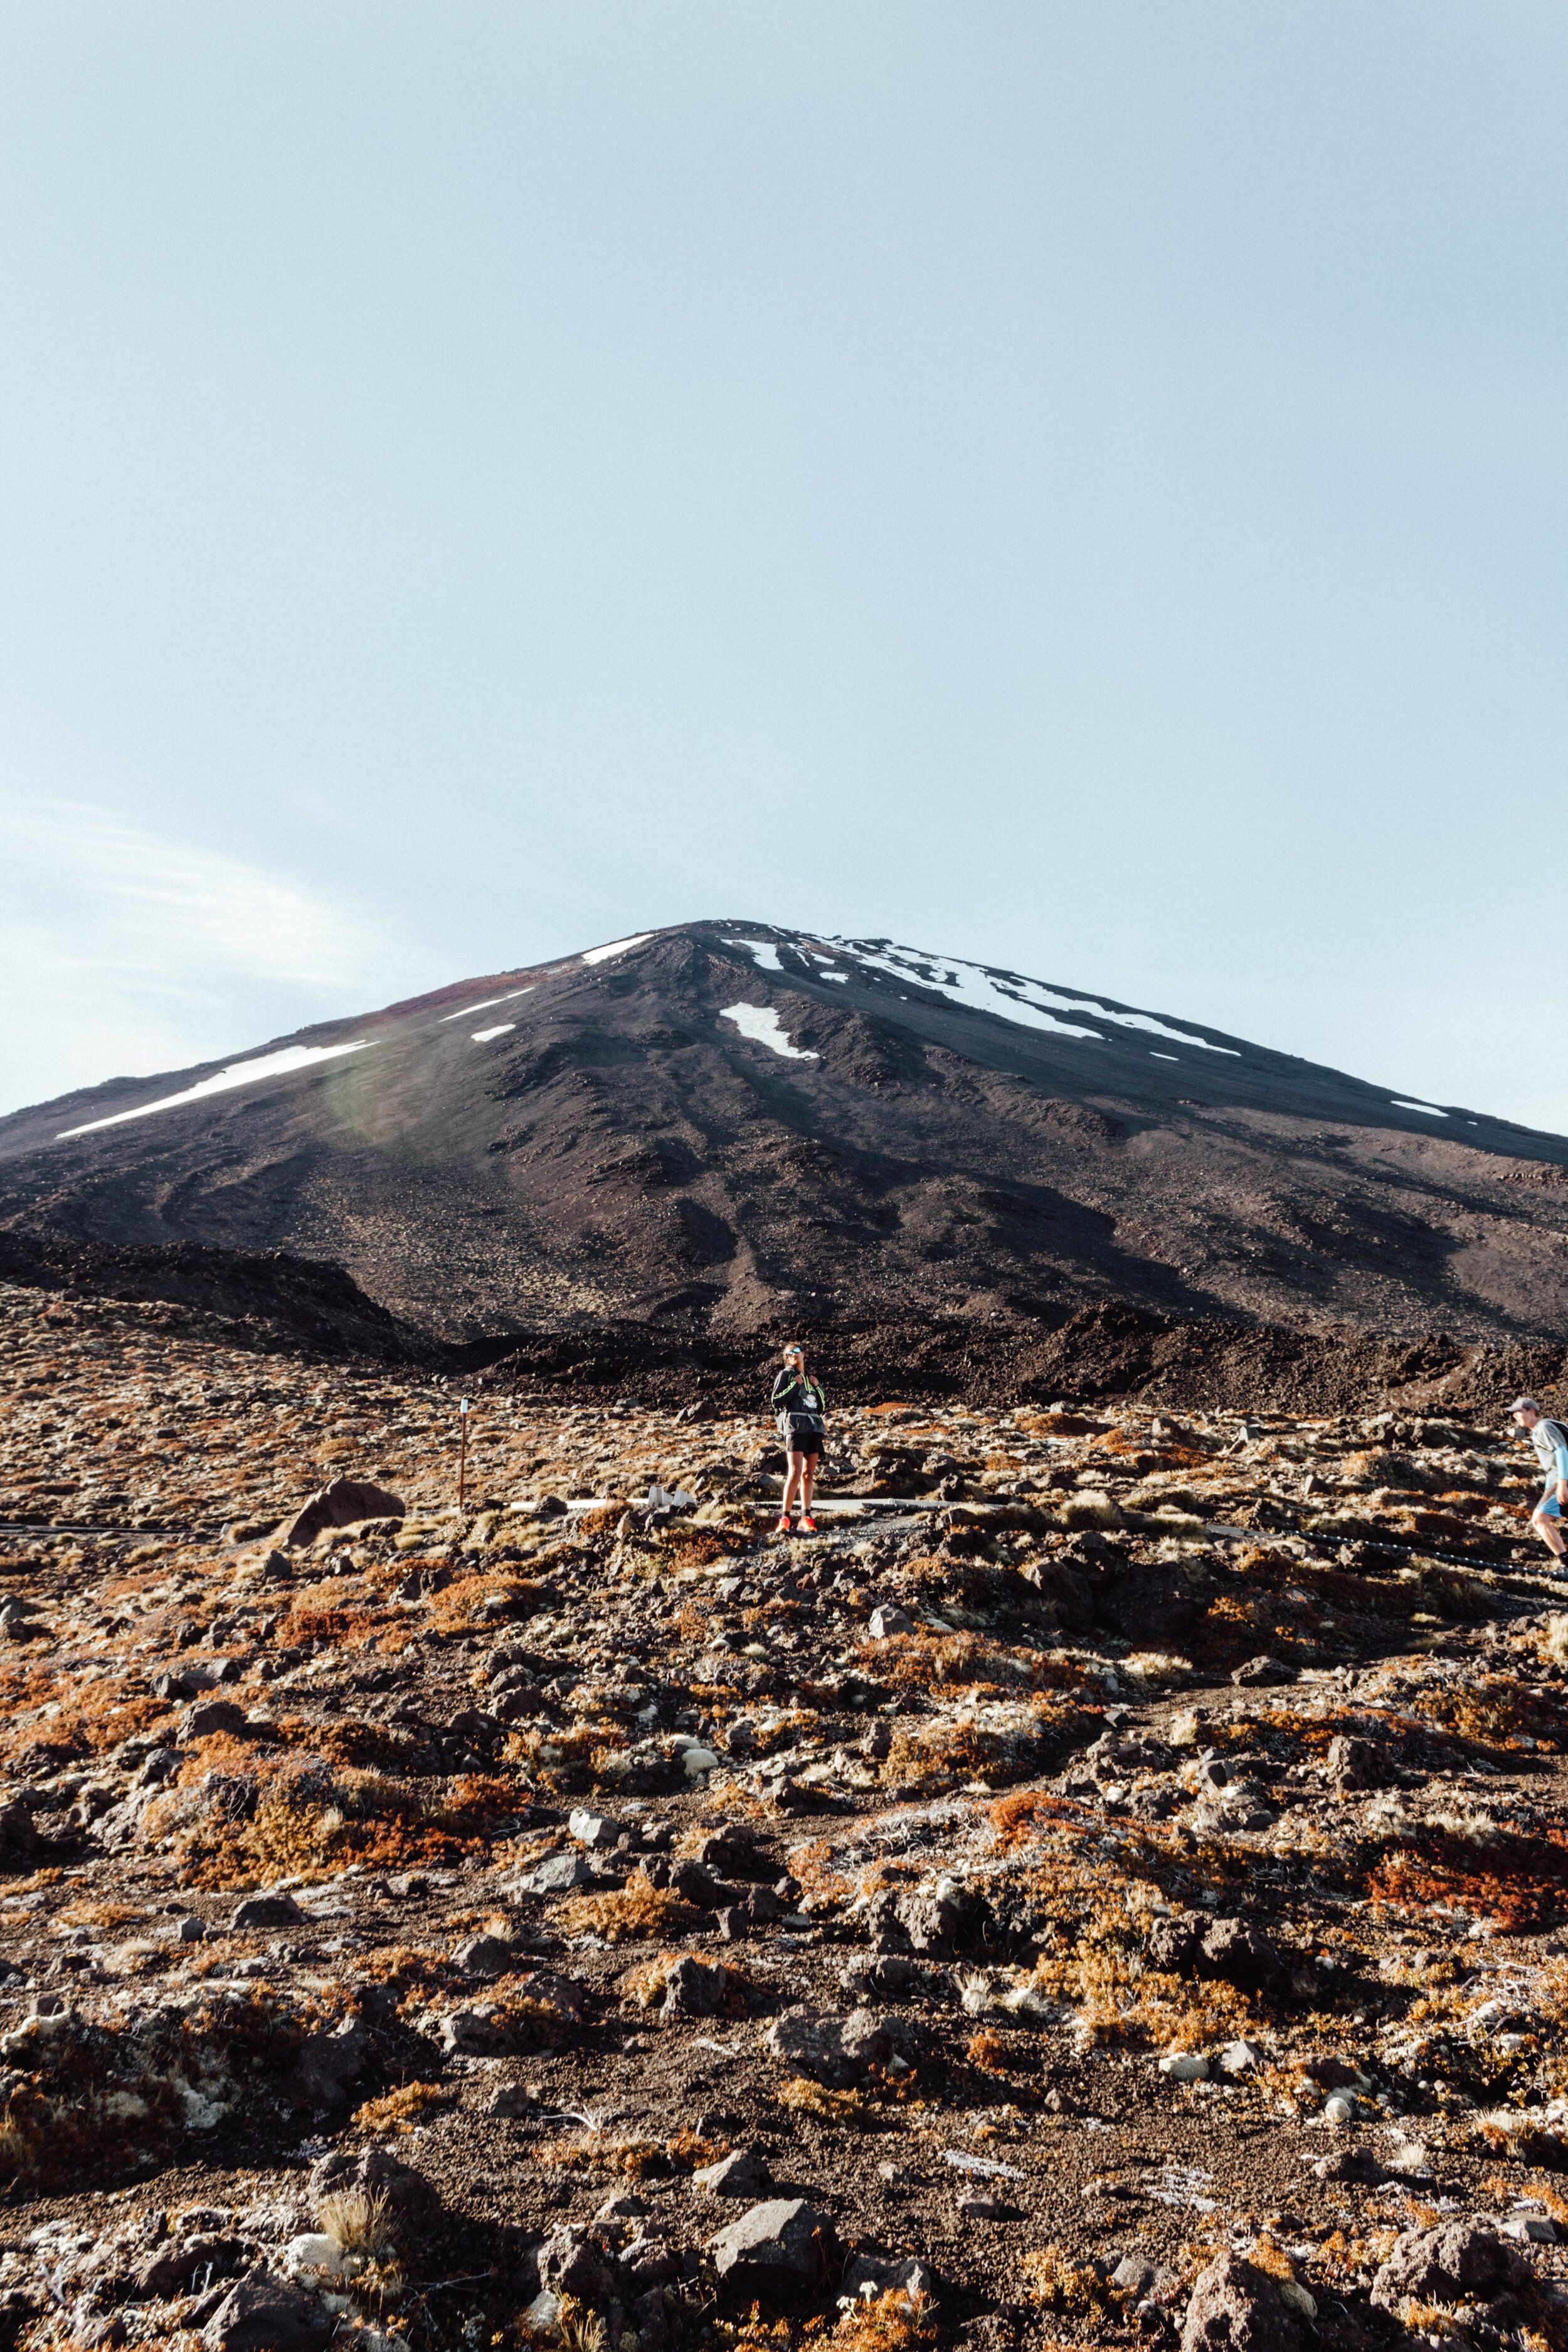
I wouldn’t want to discourage anyone from hiking, as I find nothing more enjoyable than a freakin’ tramp. However, it’s only me being honest to say that a moderate level of fitness is required. All up, our fitness watch recorded it being a 22 kilometer hike, though officially it’s 19.4 kilometers. The trail climbs almost 800m in altitude to 1900m above sea level.
I was worried about my fitness before hitting the trail. I hadn’t done serious hiking since the Inca Trail other than stints in Laos, coastal walks in Beer {in completely different climates} and hiking “The Mount” earlier during this same trip. 22 kilometers is no joke, especially when you consider you aren’t walking on flat terrain. The hike to the summit was, in a word, steep.
FINAL THOUGHTS: Those who are looking for a bush walk should probably stick to something a little easier. You don’t need to be a professional athlete, but don’t go to the crossing if your preferred method of transportation is Uber.
WHAT to pack
It’s always good to look back on a trip or trek and take note of what you’re glad you brought and what you missed putting in your pack. Here’s a quick pack list for those preparing for the crossing!
CAMERA: The views on the trek are otherworldly. Trust me, you’re gonna want to get snaps.
HAND SANITIZER: There are toilets along the trail every few hours, but they are drop-squats and you’ll need to bring hand-sanitizer.
TISSUE: The wind on the hike, particularly up top, meant I had watering eyes and a running nose for most of the journey. Luckily, my trail mother, Tash, brought tissues so I could blow my snotty nose.
REUSABLE WATER BOTTLE: There isn’t any water available one you get out on the trail. Fill up your bottle at the trailhead or before you leave your accommodation.
HIKING BOOTS: Tash tramped up the mountain in Nikes making everyone else look like fools and proving that it can be done, which brought back memories of our hike up the Inca Trail in trainers. I was glad I brought my boots out, especially during the steep downhill made entirely of loose volcanic rock.
SNACKS: I got hungry and was lucky that Tash brought muesli bars for us both {MVP of my life basically}.
SUNHAT, SUNGLASSES, SUNSCREEN: New Zealand is notorious for its extreme sun exposure. You’ll want to bring a hat to help keep your face safe from UV.
LAYERS: Our hike started at 6:37 AM in the biter cold with the sun still rising up the mountain and into the valley, but we quickly worked up a sweat climbing up to the summit. On top of the mountains, you catch major wind gusts, but on the way down the trail the sun was fully out and the heat was intense. Pack layers to make sure you’re always covered.
PLASTERS + GOOD SOCKS: I like to be prepared for the worst, always hoping for the best. Bring a small first aid kit or some plasters and good socks in cause your shoes fail you or something happens on the trail.

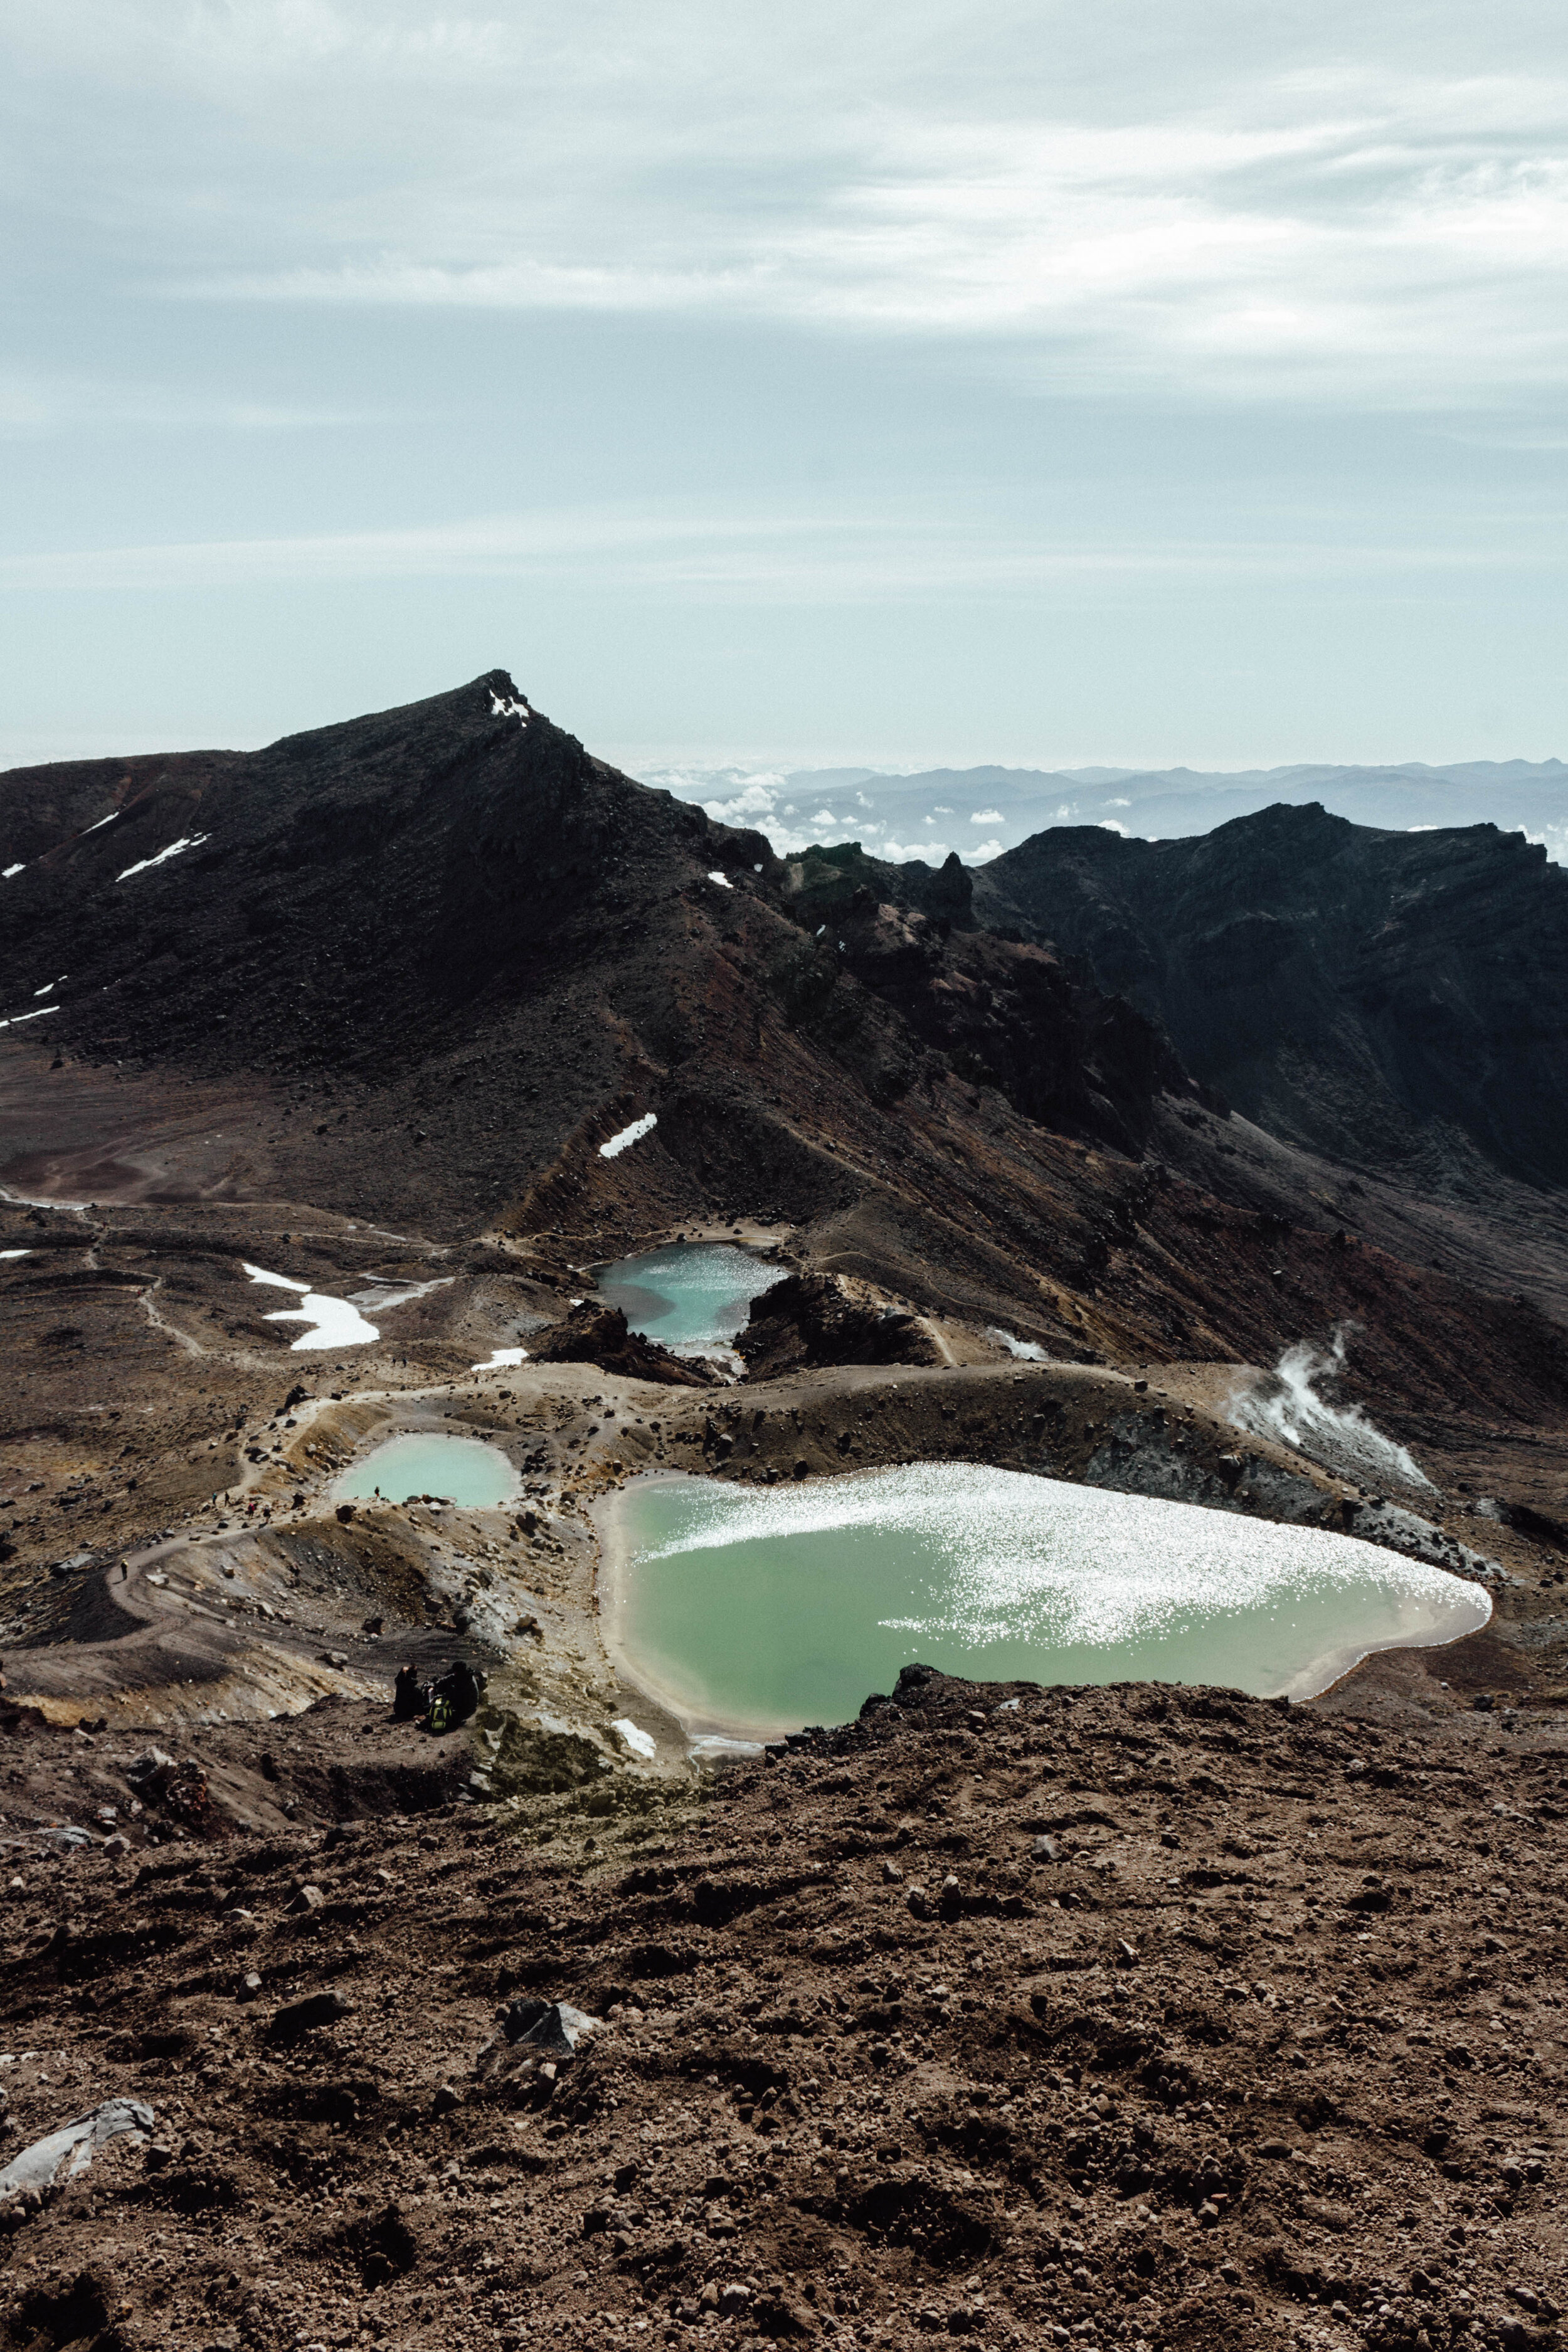
CAN YOU BELIEVE I DIDN’T EDIT THE COLOUR OF THE WATER?! UNBELIEVABLE RIGHT?!
quick tips for first-timers
Expect varying terrain, steep inclines, and changing weather. Also, and most importantly, expect amazing scenery! New Zealand offers some of the most beautiful natural landscapes of anywhere I’ve ever been in the world, so be sure to take in every moment of your trek.
My one big tip would be to start the corssing early. The 6 AM shuttle service was a blessing because we beat most of the crowds and didn’t have to worry about hiker traffic or trekking in the middle of the day {major sun exposure}. It was Tash’s idea to start early, since she’d hiked it all before, and I’m thankful for her advice, otherwise I might have gotten the 7 AM shuttle, starting with all the other hikers and leading to more congested trails.
getting to the trail
My top advice is to book accommodation to spend the night at a hostel or lodge nearby where a shuttle service can take you to the trailhead. This way you can hit the hike fresh. There are multiple backpackers hostels, including a YHA, and lodges for you to choose from. I was lucky enough to have a friend who had a free “bach” for the weekend {though the place was a full-on five-bedroom haven with a massive deck and the world’s most incredible mattress, not kidding}. I don’t recommend accommodation I haven’t stayed in personally, but if you check out places near the crossing, you can read the reviews of those who have stayed before and find the right option for you!
Once you’ve found your accommodation, find a shuttle service. We {Tash} booked us a shuttle through Tongaririo Crossing Shuttles. It was NSD $40 {approx. USD $28} per person for a shuttle to the trailhead and a shuttle back to the car park at the end of the hike. The bus wasn’t anything fancy, but it did the job and the driver was pretty crack up. There are a multitude of shuttle buses to choose from. Some offer ice cold beverages and air conditioning on the ride back to your accommodation, others {like ours} are just a basic ride to and from. It’s up to what you’d like to spend and the shuttle stops available.
NOTE: Be punctual! If you’re late for the shuttle, you’re making your fellow hikers late for their epic hiking adventure!
FOR MORE INFORMATION ON THE TONGARIRO ALPINE CROSSING, HEAD TO THE GOVERNMENT OFFICIAL WEBSITE HERE.

SOAKING IT ALL IN NEAR THE TOP
FINALLY, A FEW “THANK YOUS” ARE IN ORDER:
Tashy, my girl, I can’t tell you how much it means to have hiked another peak with you. You are too good. Hiking it with me despite having already done it and it meaning you had to get up at 4:30 AM on your Saturday…I could not ask for a better friend. The adventures we’ve had are some of my absolute favourite and also some of the most ridiculous. I love you. You’re like the MVP of my life, I swear. Always showing me that I can summit any mountain if I have people like you laughing alongside me. #fragileandproud
Thank you, Hayley, for letting Tash and I crash your relaxing weekend away {for free} at the gorgeous Balabeen. The card games, catch ups, and couch hangs were so needed, especially post hike. I’m grateful for you and for having the chance to make those memories.


